How to install the VCV Rack plugin manually
There is normally no reason to install plugins manually. However, if you were asked by Support to try a special version, or are beta-testing, then here is the procedure to do a manual installation:
-
1. Download the plugin
From the Downloads page, click to download the plugin for the type of computer you have. If you have a Mac, make sure to download the x64 version for an Intel processor, or the arm64 version for a newer Apple silicon processor.
-
2. Find your VCV Rack User Folder
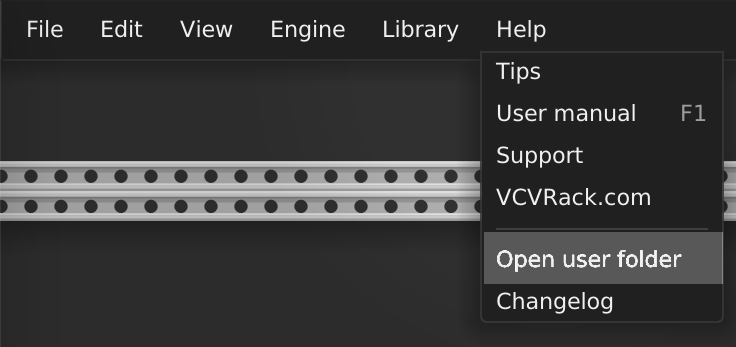
From the VCV Rack program, select "Open user folder" from the Help menu.
A folder called "Rack2" will open on your screen.
Alternatively, you can open the folder manually:
- MacOS: ~/Library/Application Support/Rack2/
- Windows: C:\Users\
\AppData\Local\Rack2\ - Linux: ~/.local/share/Rack2/
-
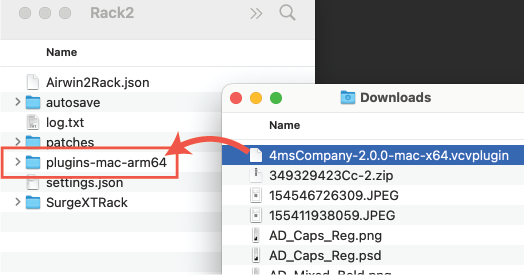
3. Put the downloaded file into the plugin directory
The folder is named after the type of computer and OS you have, but always starts with
plugins-For example, on a Mac with Apple silicon, it's called
plugins-mac-arm64, and on an Intel Mac it'splugins-mac-x64.


