MetaButtons Expander
Getting Set Up
Read the PDF quick-start guide: MetaButtons Quick Start
Basic Usage
Creating mappings
You can map buttons to virtual parameters just like you map the knobs on the MetaModule: either manually creating maps (see Creating a New Knob Mapping), or by using the Quick Map shortcut (holding down the rotary encoder and tapping a button. See Quick Map Shortcut).
Button maps and Knob Sets
Like knob maps, button maps belong to a Knob Set. Changing the Knob Set will change the button mappings, just as it changes the knob mappings.
When changing Knob Sets (whether from the encoder+button shortcut, the Knob Sets page, via MIDI, or via MetaButton shortcuts), all connected MetaButtons modules will automatically switch to the same Knob Set.
Using MetaButtons to change Knob Sets
You can configure a MetaButtons expander so that pressing Button 1 jumps to Knob Set 1, Button 2 to Knob Set 2, and so on up to Button 8 → Knob Set 8. If the patch doesn't have the requested Knob Set, the button acts normally (press and release events are passed through to the module it's mapped to).
The behavior is set in Settings > Prefs:
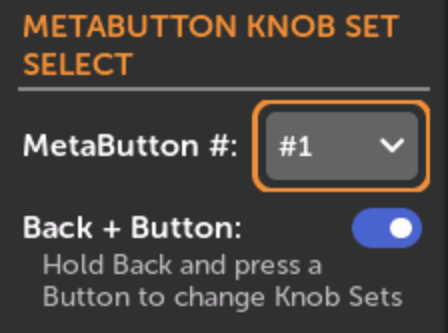
MetaButtons # selection:
-
Off: buttons never change Knob Sets (default).
-
Any: any MetaButtons expander can change Knob Sets.
-
#1 / #2 / #3 / #4: only the designated MetaButtons expander changes Knob Sets. The other expanders continue to work as normal.
Back + Expander Button mode
Optionally, you can require holding the Back button while pressing an expander button in order to switch Knob Sets. This mirrors the Back + encoder turn shortcut on the MetaModule and lets you use the same buttons for both normal mappings and Knob Set navigation in the same patch.
When this mode is on, Back events are suppressed on button release so the Back button doesn't also navigate away from the current page.
Mapping buttons alongside Knob Set navigation
If Back + Expander Button is off and you map a button that is also configured to select a Knob Set, it's unpredictable whether the button event fires against the old or new Knob Set's mappings. Turn on Back + Expander Button mode if you want to use button mappings and button-based Knob Set navigation in the same patch.
Button maps and Catchup-modes
Button maps are not constrained by Knob Catchup modes. Pressing a button will always update the mapped parameter.
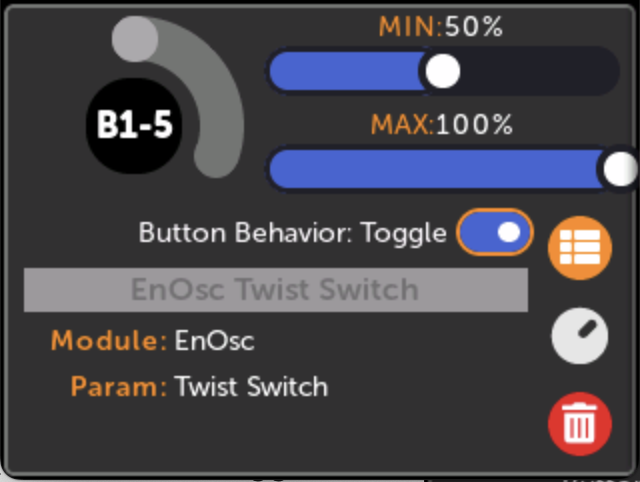
Button names
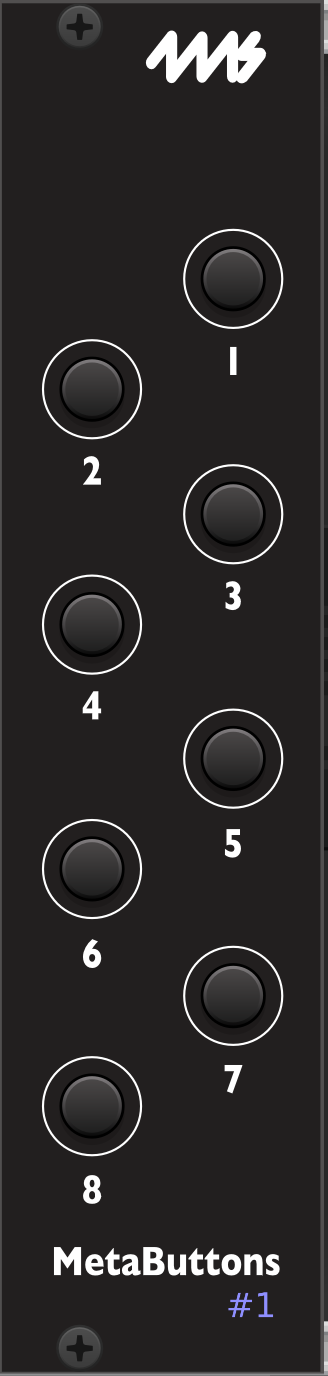
Buttons are named by the MetaButtons module number (1-4), followed by the button number (1-8). For example, if you just have one MetaButtons module then with the jumper in the default position, the first button is Button 1-1 (or B1-1 for short). The second button is Button 1-2, the third is B1-3, etc.
If you daisy chain two MetaButtons modules, and set the jumper on the second one to position 2, then the buttons on the second module will be B2-1, B2-2, B2-3, etc. (See below for information about the jumper positions)
Editing a button map
-
Select Toggle mode to alternate between two states
You can also adjust the Min and Max values to change which two states are toggled. For example, you can toggle between the middle and top positions of a three-position switch by setting Min to 50% and Max to 100%.
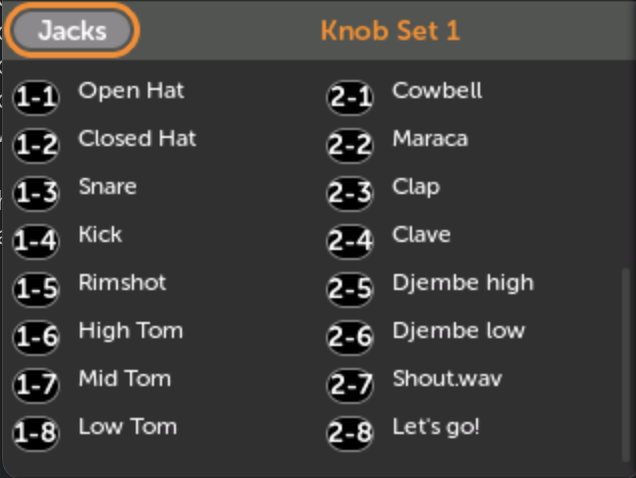
Viewing button maps
Button maps are shown below knob maps.
- 1. Open the Knob Sets page
![]()
- 2. Scroll down past the knobs to see the button maps
Creating maps with VCV Rack
Creating patches with button mappings using VCV Rack follows the same process as creating maps to knobs. The MetaButtons module in VCV Rack tracks the Hub's active Knob Set; the right-click menu on the MetaButtons module shows which Knob Set is currently active.
-
1. Add a MetaButtons module to your patch
Make sure the number in the bottom corner matches the jumper installed on the back of your module. If not, click it until it does.
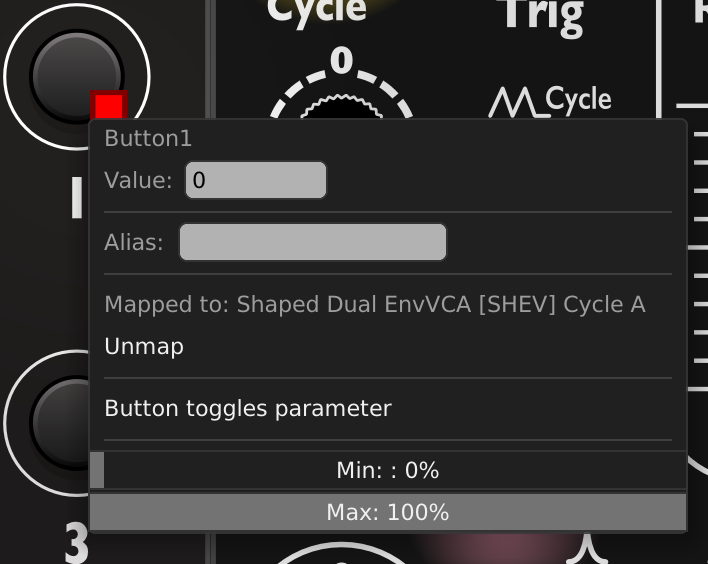
- 2. Click the mapping ring around the button, then click a virtual parameter to map to

-
3. Right-click the button to change Toggle mode
The Min and Max settings control the two values that the button toggles between.
You can also set an alias name for this mapping
-
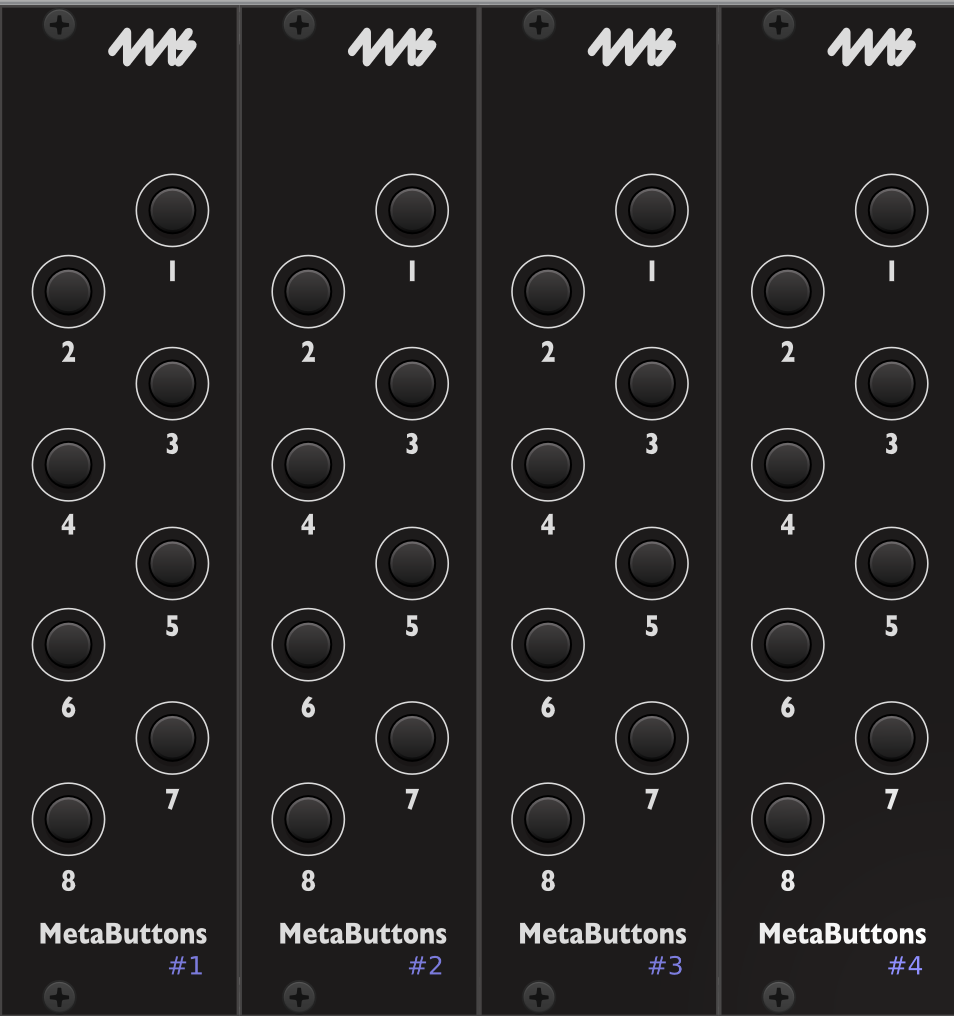
4. To use more than one MetaButtons, give each one a unique number (1-4)
Click the number to change it.
The numbers will be red if there is a conflict.
Multiple Hubs in VCV Rack
When creating a patch in VCV Rack that has more than one Hub module, all MetaButtons modules will change Knob Sets whenever any Hub changes Knob Sets.
Daisy-chaining
You can daisy-chain up to four MetaButtons using the included cables.
Connect the cables
-
Connect the first MetaButtons module to the MetaModule as described in the Quick Start guide above.
-
To attach a second MetaButtons module, remove the adapter board from the second MetaButtons' cable and store the adaptor board in a safe place for future use.
-
Attach the cable directly from the "Toward MetaModule" header on the second MetaButtons to the "Toward Expanders" header on the first MetaButtons module.
-
For a third and fourth MetaButtons module, repeat the process. Make sure each cable goes from a "Toward MetaModule" header to a "Toward Expanders" header.
-
Finally, set the jumpers on each module (see below)
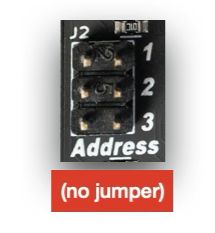
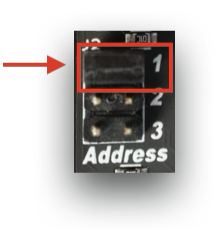
Set the jumpers
There are four slots available, and the order of the slots you choose does not matter (as long as no two modules share the same slot).
-
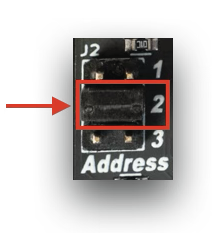
MetaButtons 1
Install the jumper in the top position
-
MetaButtons 2
Install the jumper in the middle position
-
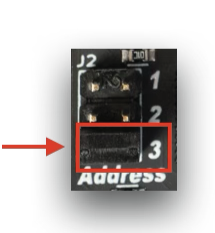
MetaButtons 3
Install the jumper in the bottom position
-
MetaButtons 4
Remove the jumper